Making your own t-shirt :D
2:09:00 PM I am so excited to share how I made my own t-shirt with the Cricut Explore Air. For this one you will need:
*Cricut
*Cricut Design Space
*Your own images. I used 3 different images for this project.. links are below!
*Two different colors of iron-on vinyl. I used black and pink glitter iron-on vinyl.
*Cricut mat, welding tool
*Iron
Alright let's get started!!
So the hardest part for this project really is setting up the image on the Cricut Design Space. So for this t-shirt it is actually for my mom for our Disneyland trip!! She LOVED my sisters shirt I had made that had just Minnie Mouse on it, but didn't want to have the same exact t-shirt as her. She also really liked my t-shirt with the castle on it. Sooo we decided to combine both of the shirt designs into one! I took the same image of Minnie Mouse I had used in my last post.. Click here for the details.. Then for my second image is the Minnie Mouse bow and the third image is the castle that I found at this website: Click here! I saved all three images to my computer. Now that I have my images I am ready to start uploading them into Cricut Design Space!
1. Uploading your images into Cricut Design Space
Upload the images into the Design Space. This image is a simple image and then click continue.

Next, we are going to erase the white space around the background only. We do not need to do the white space in the bow this time. Save the image as a "cut image". We do not need to print these images.

We will do this same process for the castle.

If you want the white lines to be cut out then you will need to click using the erase tool.

We will do the same process for the bow.

Remember to save the image as a "cut image".

2. Slicing your images
Now all your images are ready to go. I changed the images color so I could see them better. I will be cutting the bow out on pink so I changed that to pink. It doesn't matter the color of the castle. I chose gray just so I could easily see it when I place it on top of the Minnie silhouette.

The first thing to do is size the Minnie to the size you want it to be on your shirt. I used a ruler on my shirt to decide how big I wanted it. After you have the black Minnie silhouette sized you are ready to size the bow.

I placed the bow on top of the black silhouette. I sized it until it was exactly on top of the other bow and I couldn't see any more of the black bow. Next, you will select the black Minnie silhouette and the pink bow at the same time. You can do this by holding down the command key (on a Mac) and clicking on the bow and the Minnie Mouse silhouette. On the right hand side towards the top it says "layers". You can check to make sure the two items are selected by making sure they each are light blue.

Once both images are selected under the "layers" tab, at the top right, click "slice". The image will appear all black with a little bit of pink in the back.

You can now click and drag the black part of the bow away from the Minnie silhouette. We do not need any of these pieces anymore so go ahead and delete them by either clicking delete or selecting the garbage can in the bottom right. I chose to delete the pink bow because I do not love the shape after we sliced since some of it was taken off. So now we will upload another bow and place it on top of the Minnie. I want the Minnie silhouette to have the cut out of the bow so I don't have to layer the vinyl when I go to iron it onto my shirt.
3. Cutting the images
I followed the directions that came with the iron-on vinyl. The only thing different was my cloth was too thick so I just ironed straight on the transfer sheet. I ironed the black vinyl on first. Then peeled the transfer sheet away and then placed the pink bow directly in that nice cut out that we made. Then ironed the pink bow on top and it was done!
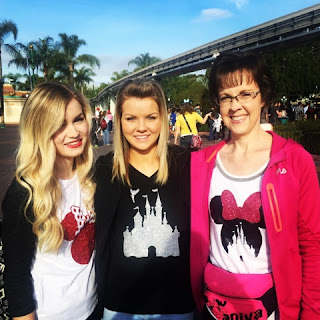
Here is everyone wearing their shirts at the magical place!! We seriously had SO much fun!


Next project: #teacher


1 comments
Love this! Are you able to share any of the images? I can't find the minnie bow or the minnie w/ bow images on those websites anymore :(
ReplyDelete