Iron-on T-shirts
3:07:00 PM
I seriously LOVE Disneyland and Disney World! It is two of my very favorite places to vacation. I went so many times as a kid and enjoyed every minute of it with my parents and siblings that I had to carry the tradition on as an adult. Back before I was married, when my husband and I were dating, he had never been to Disneyland or Disney World. I of course arranged a Disneyland trip! When we got down there to my surprise he asked me to marry him by the wishing well! Of course I said yes!! There hasn't been a year since we've been engaged that we haven't gone to Disney. Anyway, back to the t-shirt topic!
Here is how I made my very own t-shirt with my Cricut Explore Air for my vacation. All you need is your Cricut (or any machine that cuts vinyl), a blank t-shirt, your choice of iron-on vinyl, and an iron. Alright, let's get started!
1. I did a simple google search and found a website that had Disney silhouette cut outs to download for free! Click here for the link to their website. I searched through the site and found a couple different images that I liked. The first image I downloaded was just the basic Minnie Mouse ears with the polka dot bow. Download and save the image to your computer.
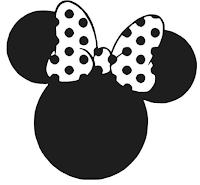
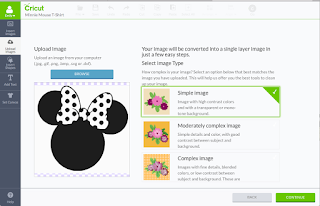
2. Once the image is downloaded and saved on my computer, I uploaded the image into the Cricut design software. I chose the option simple image. Then click continue.
Next you will have the option to erase all the things in the image you do not want to appear when you upload it to your canvas. Use the erase tool to erase the background and in between the bow and the polka dots so it is transparent. This is very important because if you don't select all the white spaces it will just appear as one black minnie blog when you are done. You'll know if you have done this correctly if the polka dots on the Minnie bow appear on your canvas when you have fully imported your image. If it did not work, start the process over and beside to click on all the white space.
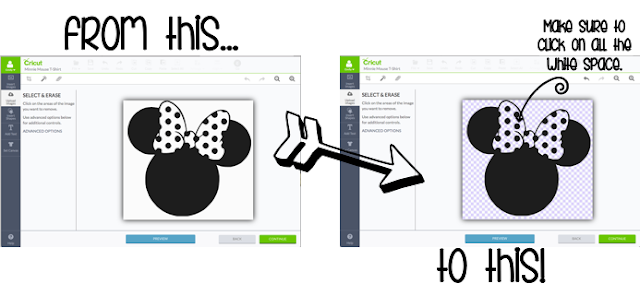

Next you will have the option to erase all the things in the image you do not want to appear when you upload it to your canvas. Use the erase tool to erase the background and in between the bow and the polka dots so it is transparent. This is very important because if you don't select all the white spaces it will just appear as one black minnie blog when you are done. You'll know if you have done this correctly if the polka dots on the Minnie bow appear on your canvas when you have fully imported your image. If it did not work, start the process over and beside to click on all the white space.

3. Now the image is ready to place on the canvas. I sized the image to the size I wanted for my t-shirt. I used a ruler on my t-shirt to decide what size I would like the image to be when I cut it out.
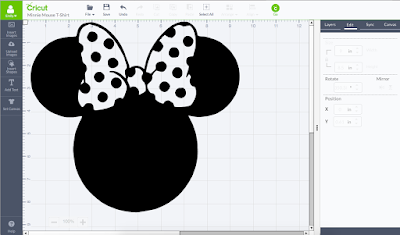

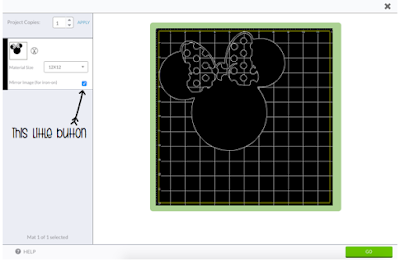
4. Now I'm ready to print! I loaded the Cricut glitter iron-on vinyl in red glitter onto my mat and hit cut! Don't forget to click the mirror option for iron-on!

5. Last step!! After I peeled the extra vinyl off the transfer sheet, I was ready to iron. I know the directions say to iron on with a cloth in between, but my towels were too thick so it wasn't getting hot enough. I turned down my iron and just ironed right on the transfer sheet. Then I peeled off the transfer sheet and IT WAS FINISHED!!
And that really is it!! From start to finish it seriously only took 20 minutes.
I gave this shirt to my sister and she absolutely loved it!! I ended up doing the same process with a Disney castle shirt for myself. The only difference was that I added a second image (Tinker bell) and put her up in the corner on top of the castle. After my mom saw how cute our two shirts turned out she came home with a blank shirt for me to add some Disney magic to. Of course I said yes! Her shirt was a little more complicated and took me about 35 minutes from start to finish. It took some slicing to get the cut out of the castle in the middle and the solid pink bow. Check out my next post to see the details of how to make the third shirt.
I think all three of our shirts turned out so cute!! And we had so much fun wearing them in the park! #disneyland #vacation #disneyforlife
Next project: Minnie shirt with Disneyland castle cut out


0 comments